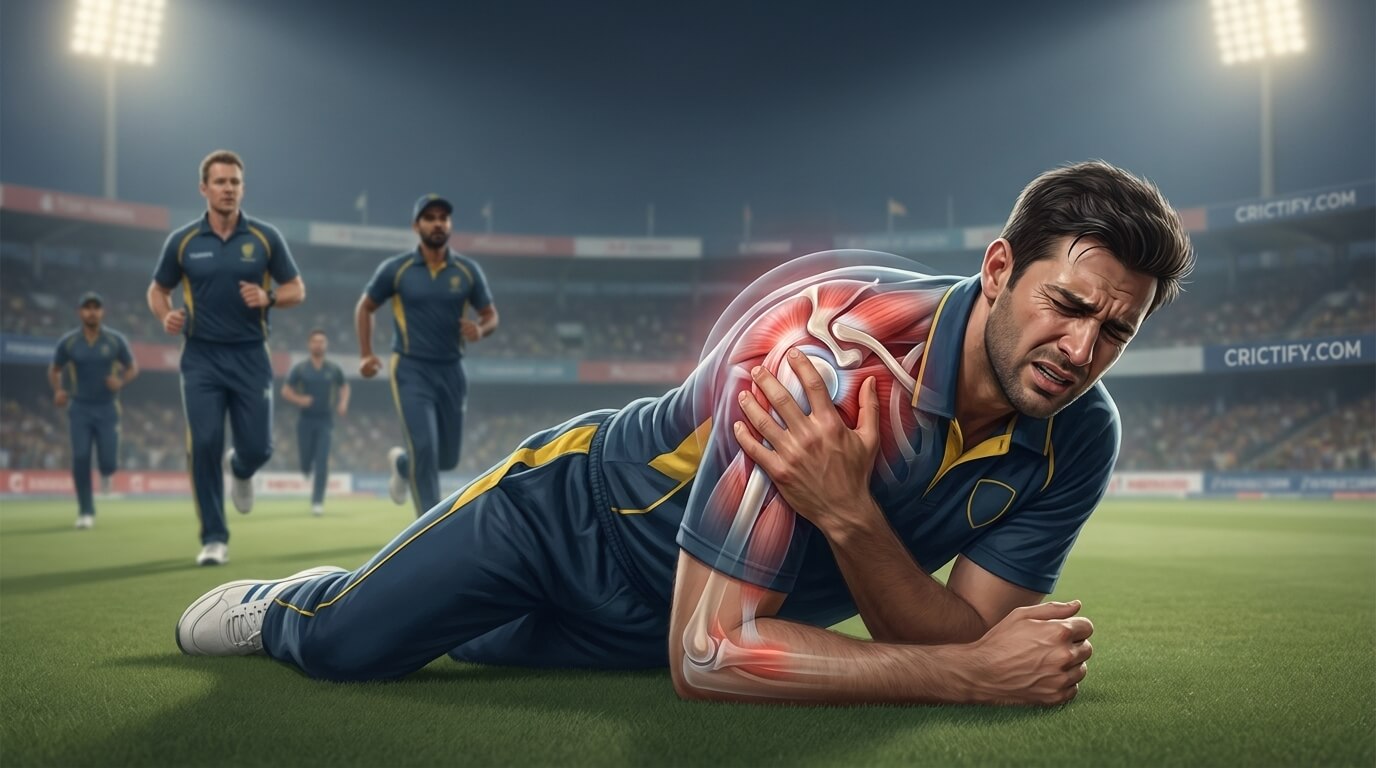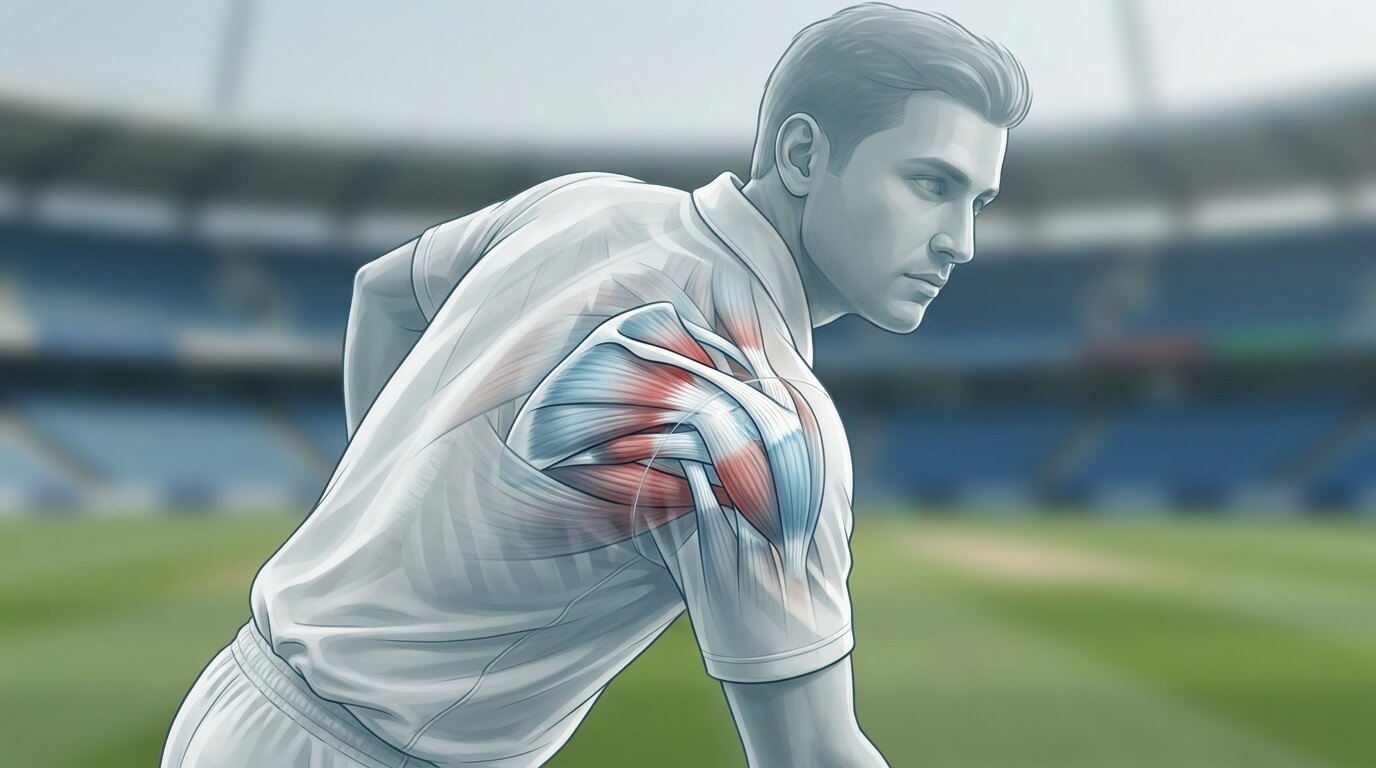
A fielder sprints to cut off a boundary, plants hard to change direction, and feels a sharp roll on the outside of the ankle. A batter pushes for a second run, turns sharply at the crease, and lands awkwardly. A fast bowler delivers at full intensity, the front foot sticks, and the ankle collapses inward on landing. A player leaps for a catch and comes down on another player’s foot. These are the moments that define ankle sprains in cricket—sudden, high-load, and often career-disrupting if not managed well.
Ankle sprain in cricket is more than “just a twist.” It can sideline a fast bowler for weeks, reduce a batter’s confidence between the wickets, or turn a reliable fielder into a hesitant mover. This guide brings together sports medicine evidence and cricket-specific demands to help players, coaches, parents, and clinicians understand what happens, what to do early, how to rehab properly, and how to return to play safely.
Quick Summary
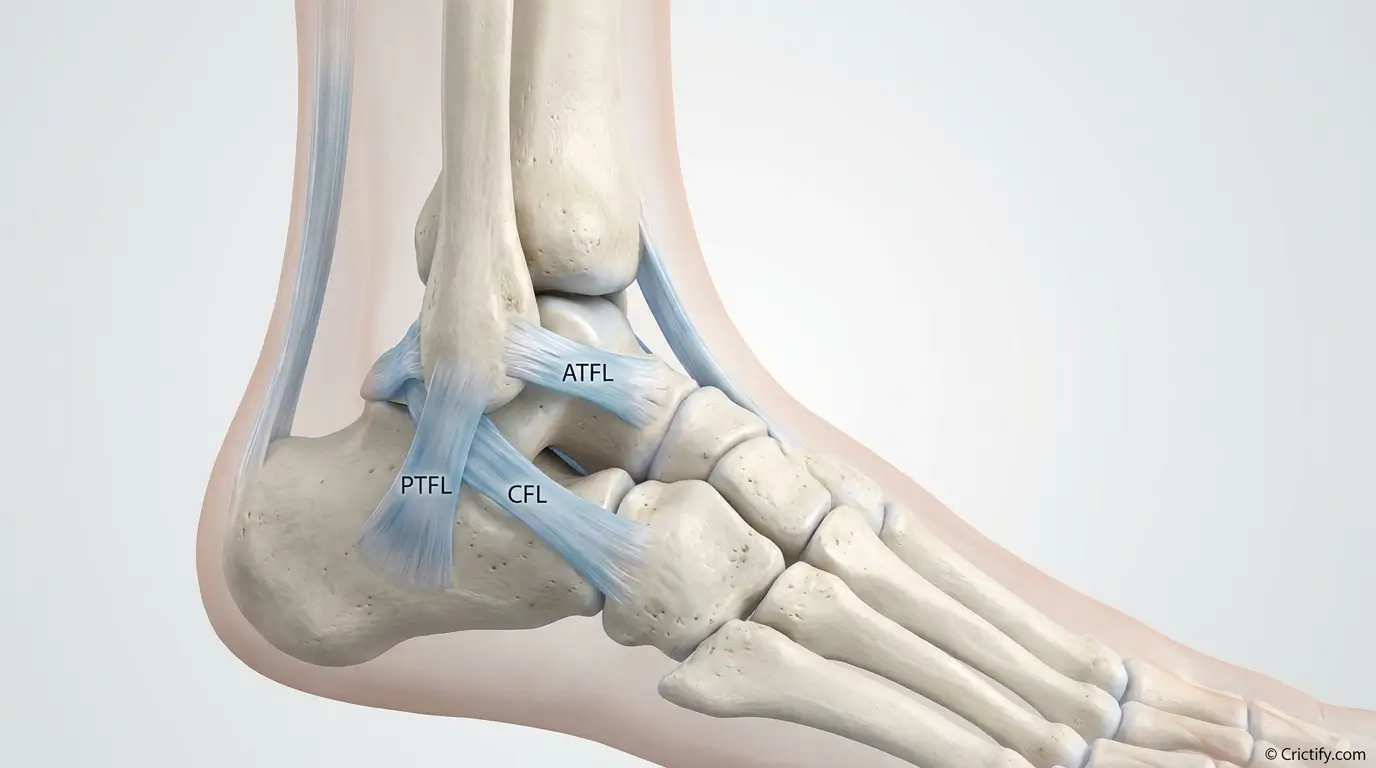
- What it is: An ankle sprain is an injury to the ligaments that stabilize the ankle joint, most commonly the lateral ligaments (ATFL, CFL, PTFL) after an inversion (rolling inward) mechanism.
- Why cricketers get it: Sprinting, sudden stops, sharp turns while running between wickets, high-speed direction changes in the field, awkward landings after a jump or dive, and the high-impact front-foot landing in fast bowling all load the ankle in vulnerable positions.
- Common symptoms: Pain (often on the outside), swelling, bruising, tenderness, difficulty walking, reduced range of motion, and a sense of instability or weakness—especially when running, jumping, or changing direction.
- Typical treatment approach: Early protection and optimal loading, compression and elevation, pain-limited movement, then progressive rehabilitation focusing on mobility, strength, balance/proprioception, and cricket-specific drills.
- Rehabilitation matters: Skipping structured rehab increases the risk of recurrent sprains and chronic ankle instability. Balance and strength work are non-negotiable for a durable return.
- Return-to-play considerations: Being pain-free in daily life is not enough. You need restored strength, balance, hopping/landing control, sprinting, and cricket-specific skills before match intensity.
- When to seek medical assessment: Inability to bear weight, severe pain/swelling, bony tenderness, deformity, numbness, or symptoms that don’t improve—these warrant professional evaluation and possibly imaging.

Ankle Anatomy: The Structures That Matter in Cricket
Understanding the ankle helps you understand why certain movements hurt and why some drills are prescribed. The ankle is not just one joint—it’s a complex of bones, ligaments, and tendons working together to absorb force, control motion, and allow propulsion.
Bones and Joints
- Tibia and fibula: The shin bones that form the “mortise” (socket) around the talus.
- Talus: The bone that sits between the tibia/fibula and the heel; it’s central to ankle motion.
- Subtalar joint: Below the talus, important for inversion/eversion (side-to-side motion).
- Syndesmosis: The ligamentous connection between tibia and fibula above the ankle joint; injury here is a “high ankle sprain.”
Ligaments Most Often Involved in Sprains
- Lateral ligaments (outside):
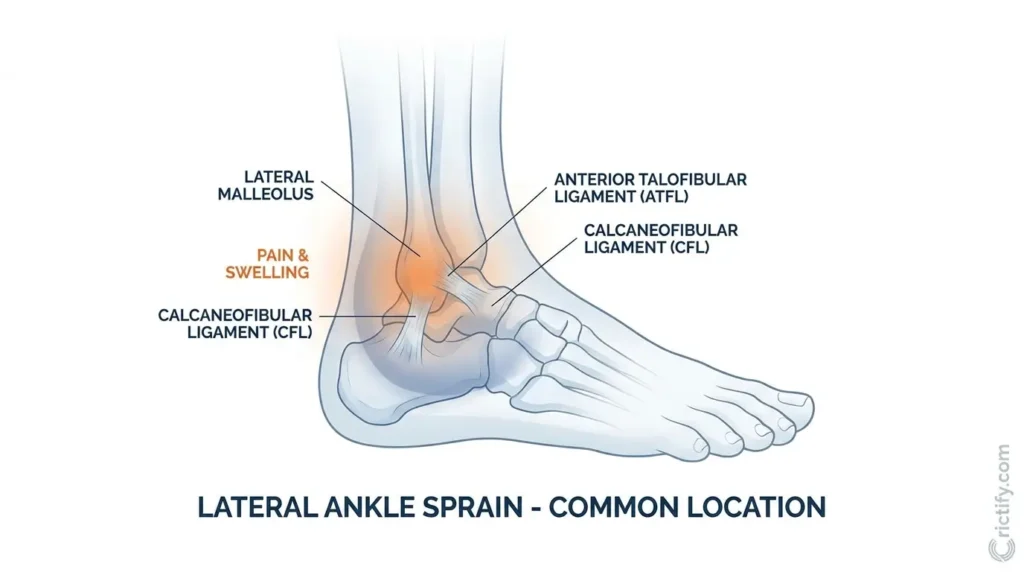
- ATFL (Anterior Talofibular Ligament): Most commonly injured in lateral ankle sprains.
- CFL (Calcaneofibular Ligament): Often involved in more significant sprains.
- PTFL (Posterior Talofibular Ligament): Less commonly injured in isolation.
- Medial ligament (inside):
- Deltoid ligament: Stronger than lateral ligaments; medial sprains are less common but can be serious.
- Syndesmotic ligaments:
- High ankle sprain: Injury to the ligaments between tibia and fibula; typically from external rotation/dorsiflexion mechanisms.
Tendons and Muscles
- Achilles tendon: Connects calf muscles (gastrocnemius/soleus) to the heel; critical for push-off in sprinting and bowling.
- Peroneals (lateral calf): Help resist inversion; weakness or delayed activation increases sprain risk.
- Tibialis anterior/posterior, toe flexors/extensors: Contribute to foot control and arch support.
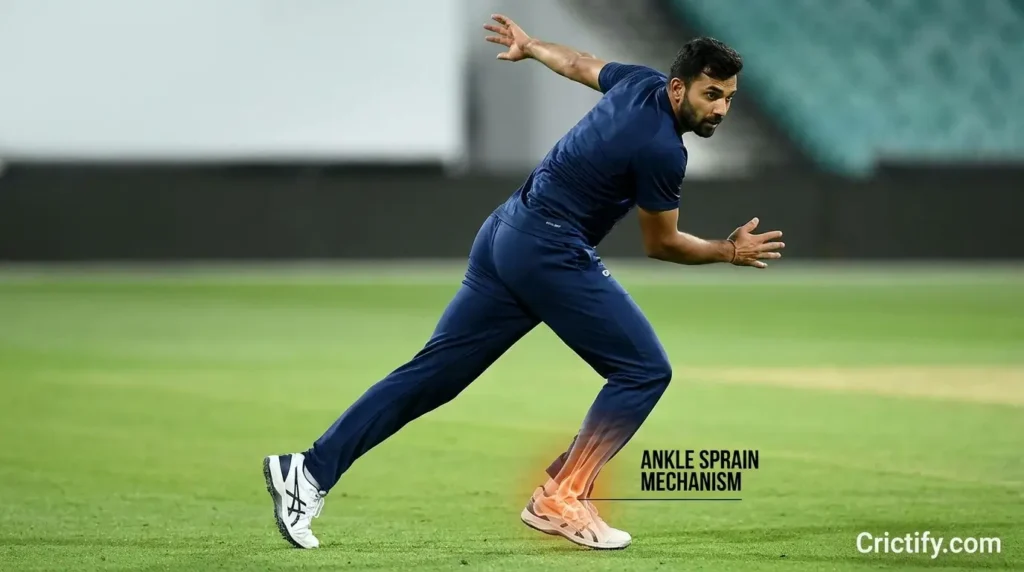
In a typical lateral ankle sprain, the foot rolls inward (inversion) while the ankle is plantarflexed (toes pointed), placing maximal strain on the ATFL and potentially the CFL.
What Is an Ankle Sprain?
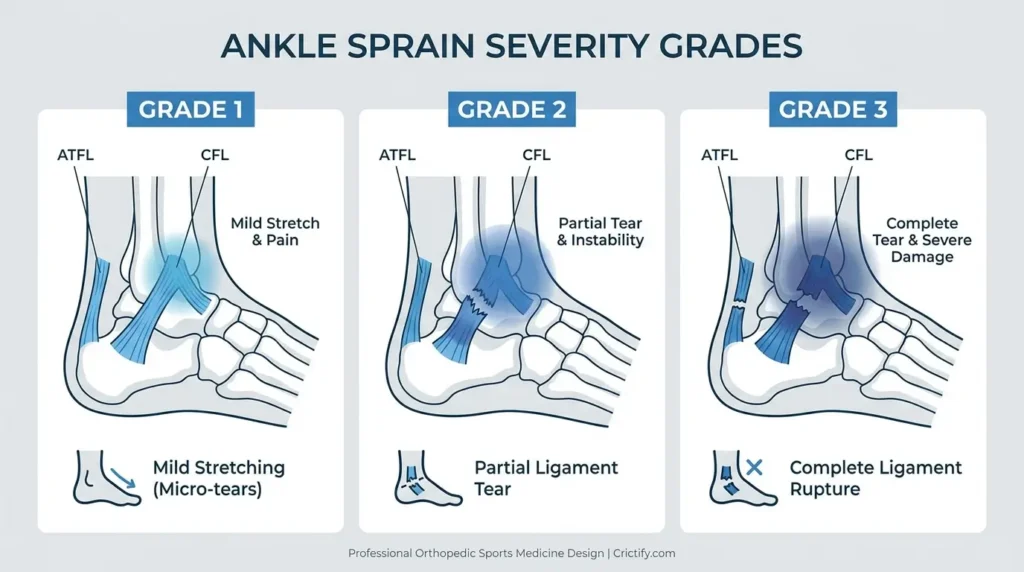
A sprain is a ligament injury. Ligaments are tough bands of tissue that connect bone to bone and stabilize joints. In an ankle sprain, these ligaments are stretched beyond their normal range, partially torn, or completely ruptured.
- Stretching (micro-tears): Mild sprain with minimal functional loss.
- Partial tearing: Moderate sprain with noticeable pain, swelling, and some instability.
- Complete tearing (rupture): Severe sprain with significant swelling, bruising, and often inability to bear weight.
Lateral vs Medial vs High Ankle Sprain
- Lateral ankle sprain: Most common; foot rolls inward (inversion), injuring ATFL/CFL.
- Medial ankle sprain: Foot rolls outward (eversion), injuring the deltoid ligament; less common but can be associated with fractures.
- High ankle sprain (syndesmotic): Injury to ligaments between tibia and fibula; often from external rotation with the foot fixed; recovery can be longer and return to sport more complex.
A “typical” lateral sprain is different from a high ankle sprain in mechanism, exam findings, and rehab timeline. High ankle sprains often hurt higher up between the shin bones and are aggravated by dorsiflexion and external rotation.
How Ankle Sprains Happen in Cricket
Cricket is not a contact sport by design, but the movement demands are intense. Ankle sprains occur when the foot is planted and the body’s momentum forces the ankle into vulnerable positions.
Common Cricket Scenarios
- Sprinting and sudden stopping: Chasing a ball in the outfield, the foot plants and the body decelerates—ankle may invert if traction is uneven.
- Sudden direction change: Cutting off a boundary or adjusting to a deflection; rapid lateral load on a planted foot.
- Running between wickets: Quick singles/doubles require sharp turns at the crease; misjudged foot placement or a slippery surface can roll the ankle.
- Fielding dives and jumps: Landing on another player’s foot, uneven turf, or with the foot in plantar flexion increases lateral ligament strain.
- Bowling delivery stride: Fast bowlers experience high ground reaction forces on front-foot landing; if the foot sticks or the surface is uneven, the ankle can invert or externally rotate under load.
- Fatigue: Late in an innings or during multi-day matches, intramuscular control drops, increasing the chance of awkward landings.
- Wet or slippery surfaces: Rain-affected outfields or dew on artificial pitches reduce traction and increase slip/roll risk.
Bio mechanically, many sprains occur when the rear foot excessively inverts on a relatively fixed or externally rotating lower leg, especially with the ankle in plantar flexion.
Which Cricketers Are Most at Risk?
Ankle sprain risk is not evenly distributed. Role, workload, and movement patterns matter.
Fast Bowlers
- Run-up and delivery stride: High-speed approach followed by a forceful front-foot landing.
- Front-foot loading: The leading leg absorbs large vertical and shear forces; the ankle must control plantar flexion and inversion under load.
- Repeated high-intensity movement: Multiple spells, overs, and matches increase cumulative stress.
- Surface interaction: Hard, uneven, or slippery surfaces change how the foot interacts with the ground.
- Associated issues: Fast bowlers with prior ankle sprains show higher rates of posterior ankle impingement and chronic instability.
Spin Bowlers
- Bowling rotation and front-foot loading: Repeated delivery strides with rotational forces can stress the ankle, especially if foot placement is inconsistent.
- Follow-through: Deceleration after delivery requires controlled ankle and foot mechanics.
Batters
- Running between wickets: Quick acceleration, sharp turns at the crease, and sliding into the popping crease load the ankle in multiple planes.
- Quick singles/doubles: Repeated high-speed running with minimal warm-up can increase injury risk.
- Footwork under pressure: Playing shots and then immediately sprinting can lead to suboptimal foot placement.
Fielders
- Sprinting and chasing: High-speed efforts to reach the ball.
- Direction changes: Cutting, curving, and adjusting to deflections.
- Diving and jumping: Landing mechanics are critical; landing on another player’s foot is a classic sprain mechanism.
Wicket keepers
- Repeated squatting: Long periods in a crouch can fatigue lower-limb stabilizers.
- Explosive lateral movement: Diving to stop edges or jumping to catch requires rapid ankle control.
- Jumping and landing: Especially on hard surfaces or when fatigued.
Junior Cricketers
- Growth and coordination: Rapid growth phases can temporarily affect balance and intramuscular control.
- Footwear and coaching: Ill-fitting shoes or inadequate technique instruction can increase risk.
- Previous injury: A prior sprain is one of the strongest predictors of another.
Causes: What Actually Tears the Ligament?
Ankle sprains are typically non-contact, but contact mechanisms exist. The key is the position of the foot and ankle at the moment of load.
- Inversion injury: Foot rolls inward; most common mechanism for lateral sprains (ATFL/CFL).
- Eversion injury: Foot rolls outward; can injure the devoid ligament and is sometimes associated with fractures.
- External rotation injury: Foot fixed while the leg rotates; typical of high ankle (synesthetic) sprains.
- Awkward landing: Plantar flexed foot landing on another player’s foot or uneven ground.
- Sudden direction change: High lateral force on a planted foot.
- Contact: Collision with another player or object forcing the ankle into a vulnerable position.
- Uneven surface: Holes, bumps, or wet patches change traction and foot placement.
- Fatigue: Reduced intramuscular control late in sessions or matches.
- Previous sprain: Incomplete rehab leads to persistent deficits in strength and preconception.
- Inadequate rehabilitation: Returning before restoring balance, strength, and sport-specific control.
Risk Factors: What You Can Change and What You Can’t
Separating modifiable from non-modifiable factors helps target prevention.
Modifiable Risk Factors
- Strength deficits: Weak personals, calf, foot intrinsic, and hip stabilizers.
- Balance/preconception deficits: Poor single-leg control and landing mechanics.
- Training load: Sudden spikes in bowling, sprinting, or fielding intensity.
- Footwear: Worn-out studs, poor fit, or inappropriate traction for the surface.
- Warm-up: Inadequate dynamic preparation before high-intensity efforts.
- Recovery: Poor sleep, nutrition, or insufficient rest between sessions.
- Previous injury management: Returning too soon or skipping rehab.
Non-Modifiable / Individual Factors
- Anatomical variation: Foot posture (e.g., high arches), ligament laxity.
- Age: Younger athletes may have growth-related coordination changes; older athletes may have degenerative changes.
- Sex: Some evidence suggests differences in sprain rates, though sport-specific data varies.
- History of sprains: Prior sprain is a strong predictor of future sprain.
Risk Factor Table
| Risk Factor | Why It Matters | Can It Be Modified? |
|---|---|---|
| Previous ankle sprain | Strongest predictor of recurrence; often leaves strength/balance deficits | Partially—via targeted rehab and prevention |
| Weak peroneal/calf muscles | Reduced ability to resist inversion and control landing | Yes—strength training |
| Poor balance/preconception | Delayed protective reflexes during unexpected foot placement | Yes—balance/perturbation training |
| Sudden load spikes | Tissues and intramuscular system not adapted to demand | Yes—progressive workload |
| Worn/unsuitable footwear | Poor traction or support increases slip/roll risk | Yes—appropriate shoes and replacement |
| Inadequate warm-up | Muscles and nervous system not primed for high-speed tasks | Yes—structured dynamic warm-up |
| Fatigue/poor recovery | Intramuscular control declines with tiredness | Yes—sleep, nutrition, scheduling |
| Anatomical foot posture | Alters how forces are distributed through the ankle | Limited—orthotics may help in select cases |
| Ligament laxity | Naturally looser ligaments may be more prone to sprain | Limited—focus on neuromuscular control |
| Age/growth phase | Coordination and strength may lag behind growth spurts | Partially—load management and technique |
Symptoms: What an Ankle Sprain Feels Like
Symptoms vary by severity and the structures involved, but certain patterns are typical.
- Pain: Often on the outside (lateral) of the ankle; worse with weight-bearing, walking, running, or jumping.
- Swelling: Develops quickly (hours) around the lateral ankle; can extend to the foot.
- Bruising: May appear over 24–72 hours, tracking down toward the toes due to gravity.
- Tenderness: Especially over the lateral ligaments (ATFL/CFL) or bony prominence if fracture is present.
- Difficulty walking: Limping or inability to bear weight in more severe cases.
- Reduced range of motion: Stiffness, especially in complexion (bringing toes toward shin).
- Instability: Feeling that the ankle might “give way,” especially on uneven ground or during cuts.
- Weakness: Push-off feels weak; single-leg balance is difficult.
- Pain during running/jumping: High-load tasks reproduce symptoms.
Severity influences symptoms: mild sprains may allow near-normal walking; severe sprains can make weight-bearing impossible.
Early Warning Signs: Don’t Ignore a “Niggly” Ankle
Recurrent or persistent ankle issues often precede a full sprain.
- Mild ankle discomfort: After training or matches, especially on the lateral side.
- Recurrent stiffness: Morning stiffness or after sitting, then “loosening up.”
- Instability: Feeling unsure on uneven ground or when cutting.
- Pain after training: Lingering soreness that doesn’t settle within 24–48 hours.
- Reduced balance: Struggling with single-leg tasks compared to the other side.
- Reduced confidence: Hesitation to sprint, cut, or jump fully.
- Previous sprain symptoms: Any history of sprain increases risk of recurrence if rehab was incomplete.
Ignoring these signs and continuing high-intensity cricket without addressing underlying deficits increases the chance of a more significant injury and chronic ankle instability.
Ankle Sprain Severity: Grades and What They Mean
Grading describes the extent of ligament damage. It guides treatment and expectations, but it’s not always possible to assign a grade accurately based on symptoms alone—clinical assessment and sometimes imaging are needed.
| Severity | Ligament Damage | Symptoms | Functional Impact | Medical Considerations |
|---|---|---|---|---|
| Grade 1 (Mild) | Stretching/micro-tears | Mild pain, minimal swelling, slight tenderness | Walk with minimal discomfort; little/no instability | Often managed with early protected loading and rehab |
| Grade 2 (Moderate) | Partial tear | Moderate pain, swelling, bruising; painful to walk | Limping; some instability; reduced ROM | May benefit from bracing/boot short-term plus structured rehab |
| Grade 3 (Severe) | Complete tear (rupture) | Severe pain, significant swelling/bruising | Often unable to bear weight; marked instability | Requires careful assessment; possible immobilization; surgical consult in select cases |
Important: Symptoms don’t always match grade perfectly. Some Grade 2 injuries feel worse than some Grade 3 initially due to swelling and pain response. Imaging (MRI/ultrasound) may clarify in complex cases.
When to See a Doctor
Not every ankle twist needs emergency care, but certain red flags warrant prompt medical assessment.
Seek medical attention if you have:
- Inability to bear weight: Can’t take four steps both immediately after injury and at assessment.
- Severe pain: Especially if it prevents sleep or basic movement.
- Major swelling or significant bruising: Rapid, extensive swelling can indicate more serious injury.
- Visible deformity: Obvious misalignment suggests possible fracture/dislocation.
- Numbness or tingling: Could indicate nerve involvement or vascular compromise.
- Severe tenderness over bone: Especially at the tips/edges of the medial or lateral malleolus, base of 5th metatarsal, or navicular.
- Persistent instability: Ankle repeatedly “gives way” after initial injury phase.
- Suspected fracture or high-energy trauma: E.g., fall from height, direct blow.
Early assessment helps rule out fractures, high ankle sprains, or associated injuries that change management.
Diagnosis: How Clinicians Assess an Ankle Sprain
A thorough clinical evaluation is the cornerstone of diagnosis.
- Medical history: How the injury happened, previous ankle injuries, playing role, workload.
- Injury mechanism: Inversion, eversion, external rotation, landing on another foot, etc.
- Physical examination:
- Palpation: Checking for bony tenderness vs ligament tenderness.
- Range of motion: Dorsiflexion, plantar-flexion, inversion, eversion.
- Stability testing: Anterior drawer, talar tilt for lateral ligaments; squeeze test, external rotation stress for syndicalism.
- Functional assessment: Single-leg balance, hopping, gait analysis.
Clinical examination helps differentiate sprain from fracture, high ankle sprain, tendon injury, or other pathology.

X-Ray: When Is It Needed?
X-rays do not show ligaments; they show bones. They’re used to rule out fractures, not to diagnose sprains.
Ottawa Ankle Rules (widely used clinical decision rules) suggest an ankle X-ray is needed if there is pain in the malleolar zone and any of:
- Bone tenderness at the posterior edge or tip of the lateral malleolus (outer ankle bone).
- Bone tenderness at the posterior edge or tip of the medial malleolus (inner ankle bone).
- Inability to bear weight both immediately after injury and in the clinical setting (unable to take four steps independently, even if limping).
For mid-foot pain, similar rules apply for the navicular and base of the 5th metatarsal.
Not every ankle sprain needs an X-ray. If there’s no bony tenderness and you can bear weight, the likelihood of fracture is low.
MRI: When Is It Considered?
MRI shows soft tissues—ligaments, tendons, cartilage, bone marrow. It’s not routine for every sprain but is valuable in specific scenarios.
MRI may be considered when:
- Ligament injury severity is unclear and affects management (e.g., high-level athletes).
- Associated soft tissue injury is suspected (tendon tears, cartilage damage).
- Persistent symptoms despite appropriate rehab (e.g., ongoing instability, pain).
- Complex injury: Suspected high ankle sprain, osteochondral lesions, or chronic instability.
- Pre-surgical planning: If surgical stabilization is being considered.
Most uncomplicated lateral ankle sprains do not require MRI. Clinical exam and response to rehab often guide care.
Ultrasound: Uses and Limitations
Ultrasound can visualize ligaments and tendons dynamically and is operator-dependent.
Potential uses:
- Assessing ATFL/CFL integrity in experienced hands.
- Guiding injections if needed.
- Evaluating peroneal tendons for associated pathology.
Limitations:
- Operator skill affects accuracy.
- Less comprehensive than MRI for deep structures or complex injuries.
- Not universally available in all sports medicine settings.
Ultrasound can be a useful adjunct but is not a replacement for a good clinical exam.
Initial Management: What to Do in the First Days
Early management sets the tone for recovery. The goal is to protect the ankle while promoting optimal loading and healing.
- Relative rest: Avoid activities that significantly increase pain, but don’t completely immobilize unless advised.
- Protect the ankle: Use a brace or supportive taping during weight-bearing if recommended.
- Pain-limited movement: Gentle, pain-free ankle movements to prevent stiffness.
- Compression: Elastic bandage or sleeve to help manage swelling.
- Elevation: Raise the ankle above heart level when resting to reduce swelling.
- Medical assessment: Especially if red flags are present (see “When to See a Doctor”).
- Gradual return of movement: As pain allows, progress from gentle ROM to weight-bearing and strengthening.
Avoid the outdated advice of “complete rest until it heals.” Early, controlled loading improves outcomes.
Medication: Pain Relief and Anti-Inflammatories
Medication can help manage pain and swelling but should be used thoughtfully.
- Pain relief: Paracetamol/acetaminophen is often first-line for pain.
- NSAIDs (e.g., ibuprofen, naproxen): Can reduce pain and inflammation but may have side effects (stomach, kidney, cardiovascular) and are not suitable for everyone.
- Individual factors: Age, medical history, other medications, and allergies matter.
- Contraindications: People with certain conditions (e.g., ulcers, kidney disease) should avoid or use NSAIDs cautiously.
- Self-medication risks: Overuse or inappropriate dosing can cause harm. Always follow medical advice or label instructions.
Medication supports comfort; it does not replace rehabilitation.
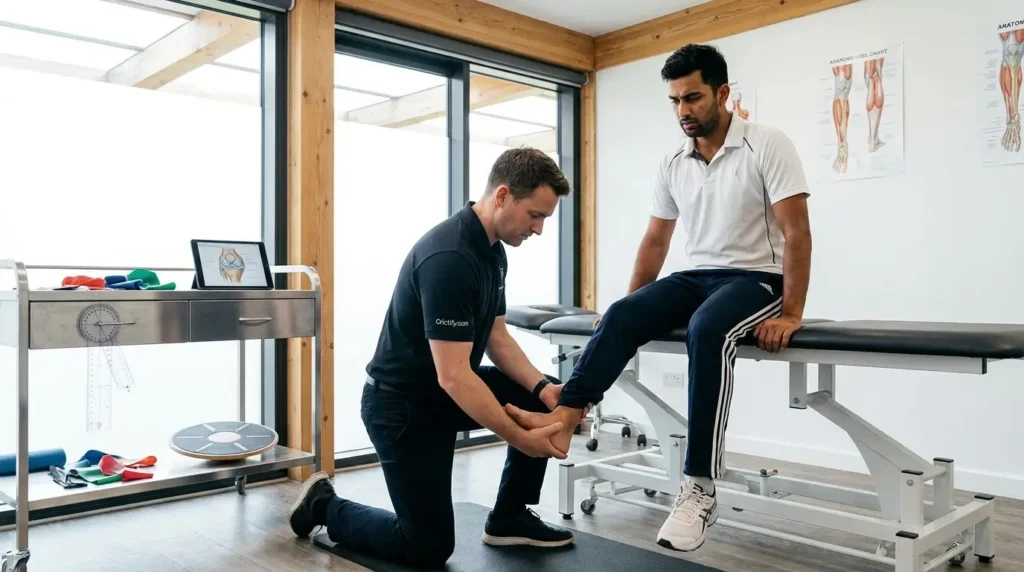
Physiotherapy: The Backbone of Recovery
Physiotherapy is where most of the healing “work” happens. A structured program addresses pain, mobility, strength, balance, and cricket-specific demands.
Rehabilitation Principles
- Pain management: Modalities, manual therapy, and activity modification to keep pain in a manageable range.
- Range of motion (ROM): Restore dorsiflexion, plantarflexion, inversion, eversion within pain limits.
- Mobility: Calf, foot, and ankle mobility to support normal gait and running.
- Strength: Calf, peroneals, foot intrinsics, tibialis, and hip stabilizers.
- Balance/proprioception: Single-leg control, perturbation training, dynamic balance.
- Progressive running: From walking to sprinting with clear milestones.
- Sport-specific training: Cricket drills that replicate match demands.
Rehab is not linear; some days feel better than others. Progress is based on symptoms and function, not just time.
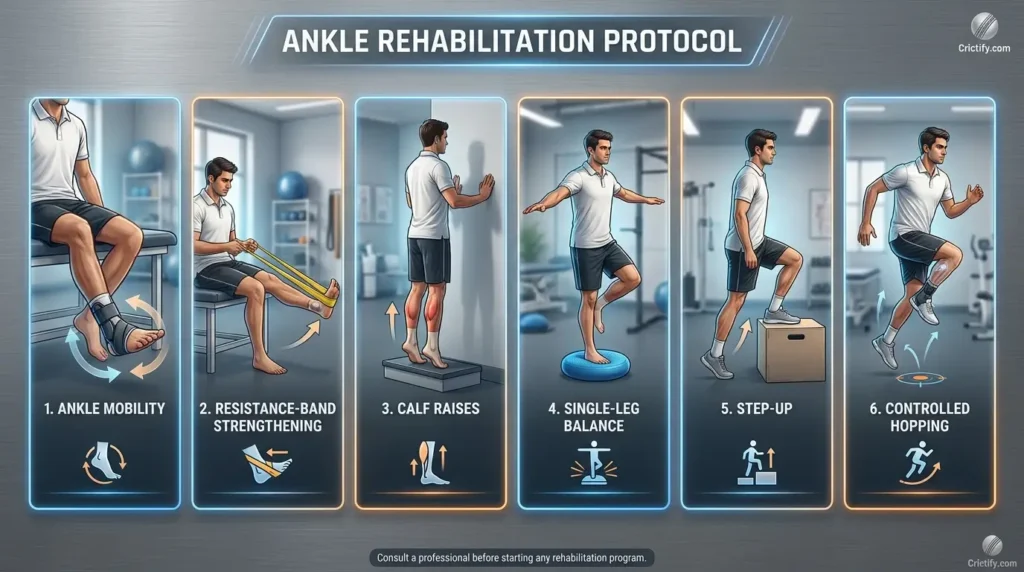
Ankle Rehabilitation Exercises: A Progressive Approach
Exercises should be individualized. The following are common components, but progression depends on symptoms, function, and clinician guidance.
Ankle Alphabet / Controlled ROM
- Purpose: Restore pain-free mobility and reduce stiffness.
- Technique: Seated or lying, move the ankle through all directions; trace the alphabet with your toes.
- Common mistakes: Pushing into sharp pain; moving too fast.
- Progression: Increase range as pain allows; add gentle overpressure with a towel for dorsiflexion.
- When appropriate: Early phase, once acute pain/swelling start settling.
- Modification: Reduce range or frequency if pain increases significantly afterward.
Calf Raises
- Purpose: Restore push-off strength for running and bowling.
- Technique: Start double-leg, progress to single-leg; rise onto toes, lower slowly.
- Common mistakes: Bouncing at the top; leaning forward excessively.
- Progression: Add load (backpack, weights), increase reps/sets, progress to eccentric focus (slow lowering).
- When appropriate: Once weight-bearing is comfortable and basic ROM is restored.
- Modification: Reduce height or use support if balance is limited.
Resistance-Band Ankle Strengthening
- Purpose: Strengthen peroneals (eversion), tibialis (dorsiflexion), and other ankle muscles.
- Technique: Anchor band; perform controlled eversion, inversion, dorsiflexion, plantarflexion.
- Common mistakes: Using momentum; letting the knee collapse inward.
- Progression: Increase band resistance, add reps/sets, integrate into functional positions.
- When appropriate: Early to mid-phase, once basic ROM is comfortable.
- Modification: Reduce resistance or range if pain increases.
Single-Leg Balance
- Purpose: Improve proprioception and dynamic stability.
- Technique: Stand on one leg, maintain posture; progress by closing eyes or using unstable surfaces.
- Common mistakes: Locking the knee; holding onto support unnecessarily.
- Progression: Add head turns, ball toss, or reach tasks (Y-balance).
- When appropriate: Once weight-bearing is stable and pain is controlled.
- Modification: Use light support initially; reduce duration if symptoms flare.
Step-Ups
- Purpose: Build functional strength and control for running and bowling.
- Technique: Step onto a box/bench, control the descent; progress height/load.
- Common mistakes: Letting the knee cave in; rushing the movement.
- Progression: Increase height, add load, progress to lateral step-downs.
- When appropriate: Mid-phase, when basic strength and balance are improving.
- Modification: Reduce height or use support if balance is limited.
Controlled Hopping / Landing Drills
- Purpose: Prepare for sprinting, jumping, and change of direction.
- Technique: Start with small two-foot hops, progress to single-leg hops; focus on soft, controlled landings.
- Common mistakes: Landing stiffly; letting the ankle roll inward.
- Progression: Increase height/distance, add direction changes, integrate sport-specific patterns.
- When appropriate: Late phase, when strength and balance are solid and running is tolerated.
- Modification: Reduce intensity or volume if pain/swelling increases.
Rehabilitation is not a one-size-fits-all prescription. A physiotherapist will tailor exercises to your role (bowler, batter, fielder), injury severity, and response to loading.
Balance and Preconception: Why They’re Critical
After an ankle sprain, the nervous system’s ability to sense joint position and react quickly can be impaired. This is proprioception. Deficits here contribute to recurrent sprains and chronic instability.
- Single-leg balance: Foundational drill; progress by adding challenges (eyes closed, head turns, reaching).
- Perturbation training: Unexpected nudges or surface changes to train reactive stability.
- Dynamic balance: Y-balance or star excursion tests/drills to challenge reach while maintaining single-leg control.
- Landing control: Emphasize knee-over-toe alignment, soft landings, and avoiding ankle roll.
- Change of direction: Progress from planned cuts to reactive drills that mimic match scenarios.
Balance training is not optional for cricketers who want to reduce reinjury risk. Evidence shows proprioceptive training can significantly reduce ankle sprain incidence.
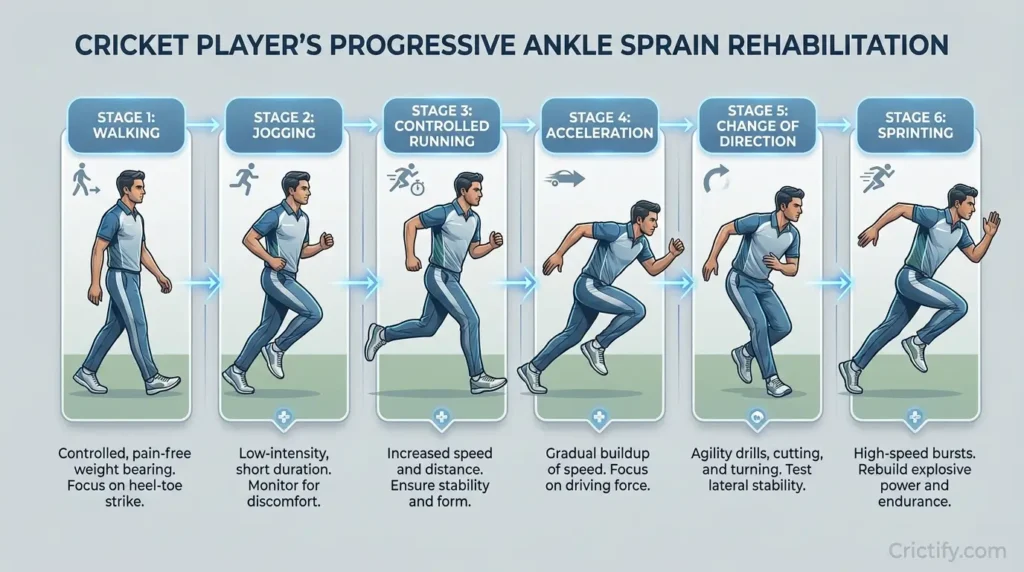
Return to Running: A Stepwise Progression
Running is a high-load task. Returning too quickly is a common cause of setbacks. Progression should be symptom-guided and functional.
- Walking: Pain-limited, normal gait pattern.
- Brisk walking: Increase speed while maintaining good mechanics.
- Easy jogging: Short intervals on flat, even surfaces; monitor pain/swelling response.
- Controlled running: Steady pace, no sharp cuts; build duration gradually.
- Acceleration: Short bursts of faster running; ensure good push-off and landing.
- Deceleration: Practice controlled slowing; deceleration loads the ankle significantly.
- Direction changes: Planned cuts (45°, 90°), progressing to sharper angles.
- Sprinting: Maximal efforts once submaximal running is well tolerated.
- Cricket-specific running: Running between wickets, chasing balls, fielding patterns.
At each stage, watch for:
- Pain during or after (should be mild and settle within 24 hours).
- Swelling increase.
- Limping or altered mechanics.
- Sense of instability.
If any of these occur, step back a stage and rebuild.
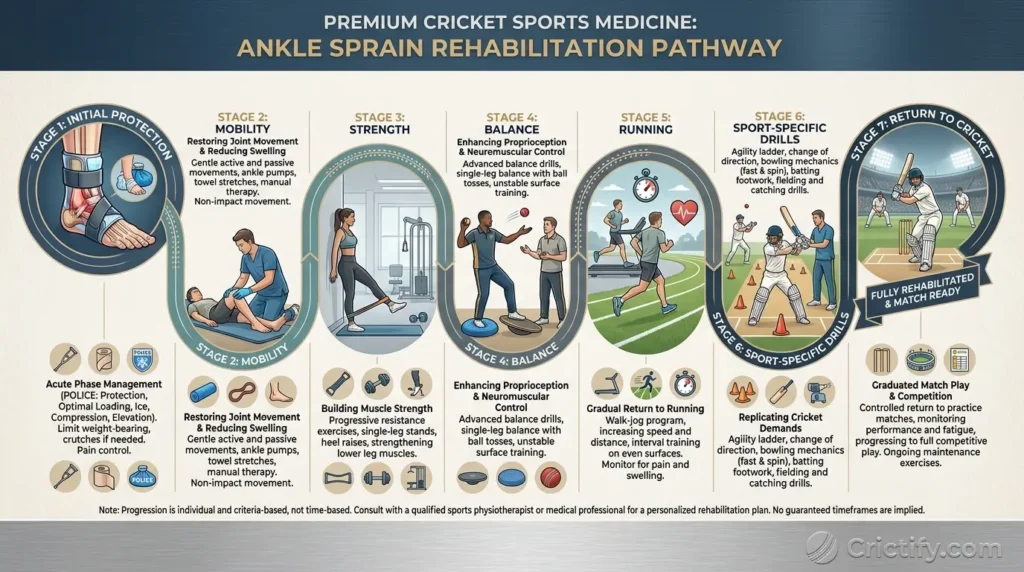
Recovery Timeline: Why There’s No Universal Clock
Recovery varies widely. Severity, ligaments involved, associated injuries, previous sprains, age, training load, rehab quality, and sport demands all influence timelines.
| Stage | Main Goal | Typical Activities | Progression Considerations |
|---|---|---|---|
| Acute/Protection | Control pain/swelling, protect ligaments | Relative rest, compression, elevation, gentle ROM | Avoid activities that significantly increase pain; use brace/tape if advised |
| Early Rehab | Restore pain-free ROM, begin loading | Ankle alphabet, isometrics, double-leg calf raises, basic balance | Progress when pain is controlled and gait is near-normal |
| Strength/Balance | Build strength and proprioception | Resistance-band work, single-leg balance, step-ups, controlled hops | Ensure good form; monitor 24-hour symptom response |
| Running Progression | Reintroduce running loads | Walk → jog → run → accelerate → cut → sprint | Advance only if pain/swelling are minimal and mechanics are sound |
| Sport-Specific | Replicate cricket demands | Batting footwork, bowling drills, fielding patterns | Integrate role-specific loads; monitor fatigue and recovery |
| Return to Play | Match readiness | Full training, then match simulation, then competition | Meet functional criteria (strength, balance, hops, sprint, confidence) |
Mild injuries may progress faster; more significant injuries or those with associated pathology take longer. Previous injuries can slow progress if deficits persist.
Return to Cricket: Pain-Free Is Not Enough
“Pain-free” in daily life does not automatically mean “ready for cricket.” Cricket demands high-speed running, sharp turns, jumping, landing, and repeated high-load actions.
Key checkpoints before returning:
- Walking: Normal, pain-free gait.
- Running: Jogging to sprinting without pain or limping.
- Sprinting: Maximal efforts tolerated without symptom flare.
- Jumping/Landing: Controlled take-off and landing; no ankle roll.
- Change of direction: Planned and reactive cuts at match-like speeds.
- Balance: Single-leg control comparable to the uninjured side.
- Strength: Calf, peroneals, foot, and hip strength restored.
- Confidence: Willingness to commit fully to movements without hesitation.
- Cricket-specific drills: Role-based tasks completed without symptom increase.
Return should be gradual: full training → match simulation → competitive play.
Return to Batting: From Stationary to Match Intensity
Batters need explosive footwork and repeated high-speed running between wickets.
- Stationary batting: Shadow shots, then light net work focusing on foot placement.
- Footwork drills: Front/back foot shots with controlled weight transfer.
- Short running: Single runs at submaximal speed; focus on smooth turns at the crease.
- Singles: Progress to match-speed singles; monitor ankle response.
- Doubles: Add second runs; ensure comfortable acceleration/deceleration.
- Sharp turns: Practice tight turns at the crease; watch for any instability.
- Match-intensity running: Simulate match scenarios (e.g., quick singles under pressure).
If pain, swelling, or instability increase after sessions, scale back and rebuild.
Return to Fast Bowling: High Loads Require Careful Progression
Fast bowling places exceptional demands on the front ankle. A cautious, stepwise return reduces reinjury risk.
- Run-up: Start with shortened run-up; focus on smooth acceleration and controlled landing.
- Front-foot landing: Begin with submaximal deliveries; ensure ankle stays stable on contact.
- Bowling delivery: Gradually increase intensity; monitor pain and swelling post-session.
- Follow-through: Ensure controlled deceleration; avoid collapsing on the landing leg.
- Repeated spells: Build volume slowly; avoid sudden spikes in overs or balls bowled.
- High-intensity movement: Integrate sprinting and fielding drills alongside bowling progression.
- Bowling volume: Track balls/overs; increase by small increments week to week.
- Recovery: Prioritize rest between sessions; monitor fatigue and ankle response.
Fast bowlers with prior ankle sprains should be especially vigilant about strength, balance, and load management.
Return to Spin Bowling: Rotation and Repetition
Spin bowlers may not hit the same peak loads as fast bowlers, but repeated delivery strides and rotational forces still stress the ankle.
- Approach: Start with shortened approach; focus on consistent foot placement.
- Front-foot loading: Ensure stable landing; avoid excessive inversion on contact.
- Rotation: Control trunk and pelvic rotation; avoid over-rotating onto an unstable ankle.
- Follow-through: Smooth deceleration; maintain balance after delivery.
- Repeated deliveries: Build spell length gradually; monitor ankle response over sessions.
As with fast bowlers, progression should be symptom-guided and function-based.
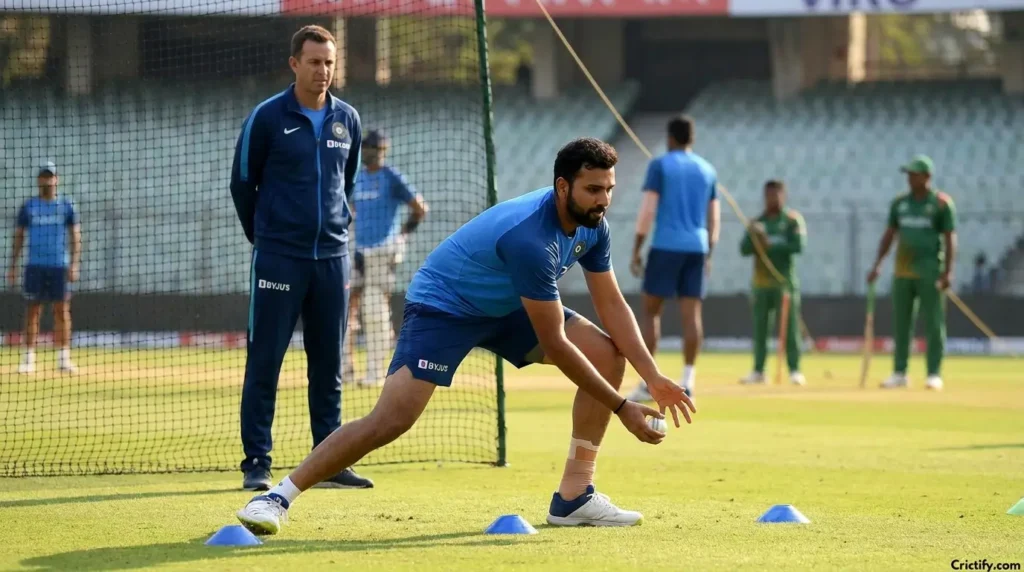
Return to Fielding: From Jogging to Diving
Fielding requires multi-directional speed, quick reactions, and confident landing.
- Jogging: Build baseline running tolerance.
- Sprinting: Progress to maximal efforts in straight lines.
- Direction changes: Planned cuts, then reactive drills mimicking ball trajectories.
- Ground fielding: Practice picking up balls at various speeds; focus on stable foot placement.
- Throwing: Integrate throwing after fielding; ensure stable base.
- Diving: Start with controlled dives on soft surfaces; progress intensity.
- Jumping/Landing: Box jumps, hurdle hops, then cricket-specific jump-landings.
- Landing: Emphasize soft, controlled landings with ankle alignment.
Fielding progression should mirror match demands: chase, cut, dive, throw, recover.
Return-to-Play Testing: Functional Benchmarks
There is no universal pass/fail score, but functional testing helps gauge readiness.
Consider:
- Pain-free daily activity: Walking, stairs, normal tasks without pain.
- Range of motion: Full or functionally appropriate dorsiflexion/plantarflexion.
- Strength restoration: Calf raises, resistance-band tests comparable to uninjured side.
- Balance: Single-leg balance time and quality similar to the other side.
- Single-leg control: Step-downs, single-leg squats with good alignment.
- Hopping: Single-leg hop tests (distance, triple hop, figure-8) within ~90–95% of uninjured side.
- Running: Jogging to sprinting without pain or limping.
- Sprinting: Maximal efforts tolerated without symptom flare.
- Direction changes: Planned and reactive cuts at match speed.
- Cricket-specific drills: Role-based tasks (bowling, batting, fielding) completed without increase in symptoms.
- Confidence: Willingness to commit fully to high-speed, high-load tasks.
These are guidelines, not rigid rules. A clinician will interpret them in context.
Prevention: Building a Resilient Ankle for Cricket
Prevention is not just about avoiding the first sprain—it’s about preventing recurrence and chronic instability.
- Strength: Calf, peroneals, foot intrinsics, tibialis, hip abductors/extensors.
- Balance/proprioception: Regular single-leg and perturbation work.
- Calf strength: Critical for push-off and landing control.
- Foot strength: Arch control and toe strength support ankle stability.
- Warm-up: Dynamic, cricket-specific preparation before training/matches.
- Progressive running: Avoid sudden spikes in sprinting or bowling load.
- Load management: Monitor balls bowled, overs, fielding intensity, and match frequency.
- Recovery: Sleep, nutrition, and rest days matter.
- Previous injury management: Complete rehab; continue maintenance exercises.
- Footwear: Appropriate studs, good fit, replace worn shoes.
- Playing surface: Inspect for holes, wet patches, uneven areas; adjust footwear accordingly.
Prevention is a habit, not a one-off program.
Warm-Up Routine: A Practical Pre-Cricket Protocol
A structured warm-up prepares the ankle and lower limb for cricket’s demands.
- General movement: 5–10 minutes of light jogging, skipping, or cycling.
- Dynamic mobility: Ankle circles, lunges with rotation, leg swings.
- Calf activation: Double- then single-leg calf raises; focus on control.
- Ankle movement: Banded dorsiflexion mobilizations, ankle alphabet.
- Balance: Single-leg stance with ball toss or head turns.
- Progressive running: Build from jog to stride-outs; include accelerations/decelerations.
- Acceleration: Short sprints at increasing intensity; focus on push-off and landing.
This routine can be adapted for team warm-ups or individual prep.
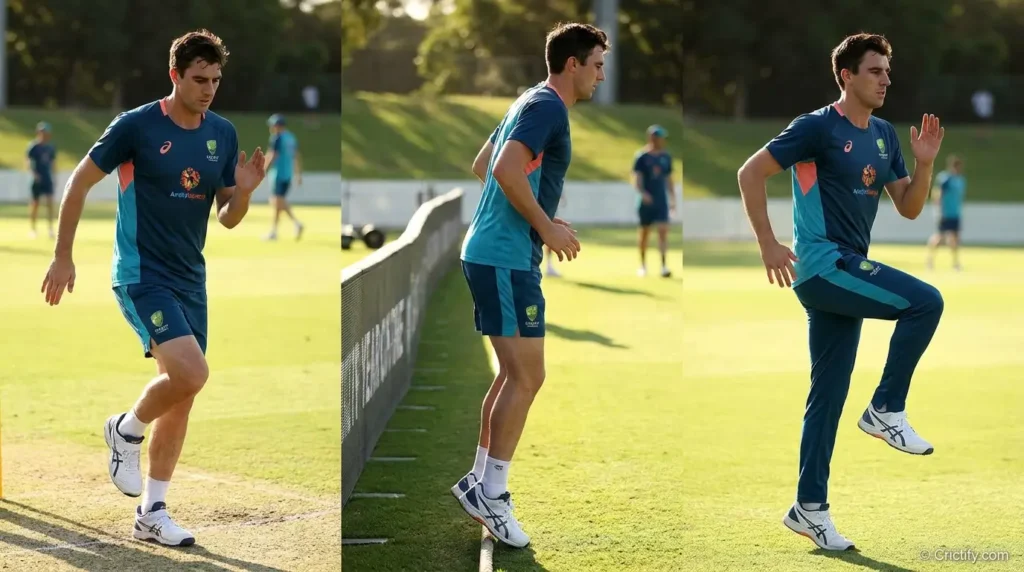
Strength Training: Beyond the Ankle
Ankle health is connected to the entire lower limb. Weak hips or poor foot control can increase ankle load.
- Calf raises: Double- and single-leg; progress to loaded and eccentric variations.
- Tibialis strengthening: Resisted dorsiflexion to balance calf dominance.
- Foot muscles: Toe curls, arch lifts, short-foot exercises.
- Resistance-band work: Eversion, inversion, dorsiflexion, plantarflexion.
- Single-leg strength: Single-leg squats, step-downs, RDLs.
- Lower-limb strength: Squats, lunges, deadlifts (as appropriate).
- Hip strength: Glute medius/maximus work (side steps, clamshells, hip thrusts) to control knee/ankle alignment.
Strong hips and feet reduce compensatory stress on the ankle.
Footwear: Traction, Fit, and Surface Match
Footwear influences how the foot interacts with the ground.
- Cricket shoes: Use appropriate studs/spikes for the surface (grass, turf, artificial).
- Appropriate traction: Too much grip on hard surfaces can increase torque; too little increases slip risk.
- Fit: Shoes should be snug but not tight; heel should not slip.
- Surface: Match footwear to conditions (e.g., longer studs for soft grass, shorter for hard turf).
- Worn-out footwear: Replace shoes when studs are worn or midsole is compressed.
- Role-specific footwear: Batters, bowlers, and fielders may have different preferences; choose based on comfort and stability, not brand hype.
No shoe can guarantee injury prevention, but appropriate footwear reduces risk.
Playing Surface: How Ground Conditions Affect Ankle Loading
Surface conditions directly influence ankle stress.
- Grass: Natural variability; watch for wet patches, holes, uneven areas.
- Turf: More consistent but can be slippery when wet; stud selection matters.
- Artificial surfaces: Often harder; may increase impact loads; ensure appropriate footwear.
- Wet conditions: Increase slip risk; adjust footwear and intensity.
- Uneven ground: Holes or bumps can cause awkward landings; inspect before play.
- Holes/slippery surfaces: Report and avoid; modify training if surfaces are unsafe.
Surface inspection and appropriate footwear are simple but effective prevention steps.
Nutrition & Hydration: Supporting Tissue Repair
Nutrition doesn’t “heal” a ligament on its own, but it supports the body’s repair processes.
- Adequate energy intake: Undereating slows recovery and increases injury risk.
- Protein: Supports tissue repair; aim for regular intake across the day.
- Carbohydrates: Fuel training and rehab sessions; support glycogen replenishment.
- Micronutrients: Vitamins/minerals (e.g., vitamin C, zinc) play roles in collagen synthesis and healing.
- Hydration: Dehydration impairs performance and recovery; maintain fluid intake.
- Recovery nutrition: Post-session meals/snacks with protein and carbs support adaptation.
No single food heals an ankle ligament, but consistent, balanced nutrition supports overall recovery.
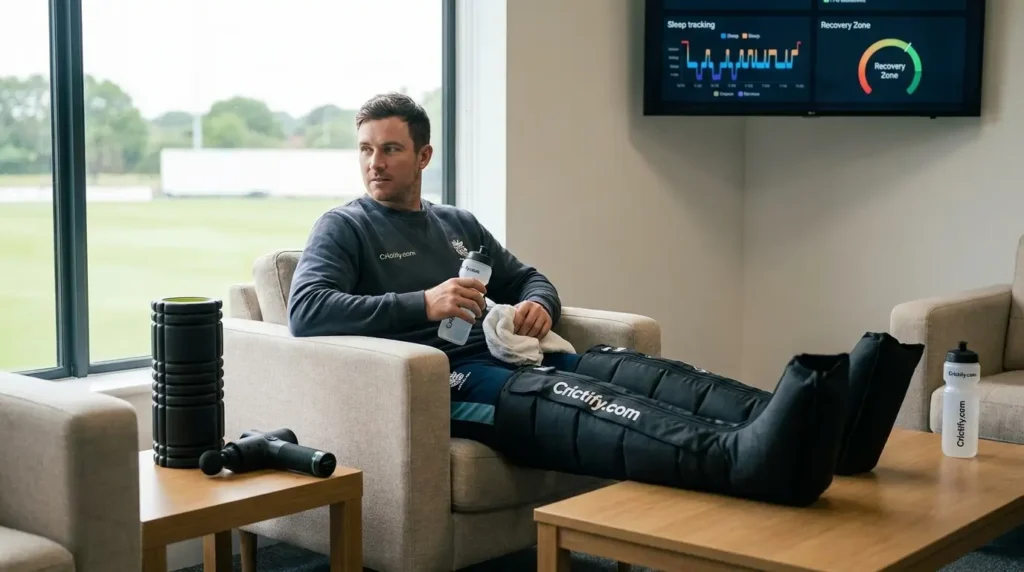
Sleep & Recovery: The Invisible Rehab
Recovery habits matter as much as exercises.
- Sleep: Critical for tissue repair, hormone regulation, and neuromuscular recovery.
- Training recovery: Plan rest days and lighter sessions between high-load days.
- Match schedules: Avoid excessive match density without adequate recovery.
- Travel: Manage jet lag and fatigue; adjust training accordingly.
- Workload: Monitor bowling volumes, sprinting loads, and fielding intensity.
- Recovery between sessions: Use active recovery, mobility, and nutrition to support adaptation.
Recovery is part of the program, not an afterthought.
Common Mistakes: What Derails Recovery
Even well-intentioned players make errors that prolong recovery or cause reinjury.
- Returning too soon: Before strength, balance, and sport-specific control are restored.
- Ignoring swelling: Persistent swelling indicates ongoing irritation; address load and rehab.
- Playing through instability: “Toughing it out” increases reinjury risk.
- Skipping rehabilitation: Stopping exercises once pain improves leaves deficits unaddressed.
- Stopping exercises once pain improves: Pain is not the only marker of readiness.
- Sprinting too early: High-speed running before the ankle is ready.
- Ignoring balance training: Focusing only on strength without proprioception.
- Wearing unsuitable footwear: Wrong studs, worn shoes, poor fit.
- Copying another athlete’s rehabilitation: Individualization matters; roles and injuries differ.
- Returning without sport-specific preparation: General running is not the same as cricket demands.
Avoiding these mistakes improves the odds of a durable return.
Do’s and Don’ts: A Practical Checklist
| DO | DON’T |
|---|---|
| Seek assessment when appropriate (red flags, persistent symptoms) | Ignore severe symptoms or inability to bear weight |
| Follow progressive rehabilitation (mobility → strength → balance → running → sport-specific) | Sprint immediately or return because pain simply decreased |
| Restore strength (calf, peroneals, foot, hip) | Copy another player’s programme without adaptation |
| Restore balance and proprioception (single-leg, perturbation, landing) | Assume an ankle brace replaces rehabilitation |
| Progress running gradually (walk → jog → run → sprint → cuts) | Skip sport-specific drills before match play |
| Complete cricket-specific drills (batting, bowling, fielding) | Return to full match intensity without testing tolerance |
| Monitor swelling and 24-hour symptom response | Overload the ankle in early phases |
| Use appropriate footwear for surface and role | Wear worn-out or ill-fitting shoes |
| Prioritize sleep, nutrition, and recovery | Neglect load management and recovery between sessions |
| Continue maintenance exercises after return | Stop all ankle work once pain is gone |
This table is a guide, not a substitute for individualized medical advice.
Reinjury and Chronic Ankle Instability
Recurrent sprains and persistent instability are common when rehab is incomplete.
- Recurrent ankle sprains: Often due to residual strength/balance deficits or returning too soon.
- Poor rehabilitation: Stopping exercises early leaves the ankle vulnerable.
- Persistent instability: Feeling of “giving way” during cuts or landings.
- Balance deficits: Impaired proprioception delays protective reflexes.
- Strength deficits: Weak peroneals/calf reduce dynamic stability.
- Fear of movement: Hesitation can alter mechanics and increase risk.
- Chronic ankle instability (CAI): A syndrome of recurrent sprains, perceived instability, and functional deficits.
Completing rehabilitation—even after pain disappears—is essential to reduce long-term risk.
Cricket-Specific Return Checklist
Use this as an educational guide, not a substitute for medical clearance.
- Normal daily walking without pain or limping
- Appropriate range of motion (dorsiflexion, plantarflexion, inversion, eversion)
- Strength restored appropriately (calf, peroneals, foot, hip)
- Good single-leg balance (comparable to uninjured side)
- Hopping tolerated (single-leg, triple hop, figure-8) without symptom flare
- Running tolerated (jog to steady run) without pain/limp
- Sprinting progressed (acceleration, deceleration, maximal efforts)
- Direction changes completed (planned and reactive cuts)
- Batting movement tested (footwork, running between wickets)
- Bowling progression completed if relevant (run-up, delivery, spells)
- Fielding drills completed (sprint, cut, dive, jump, land, throw)
- Player confidence restored (willingness to commit fully)
- Medical/physio guidance obtained where appropriate
This checklist is educational and should be adapted to the player’s age, injury, medical history, playing role, and clinical findings.
When Can I Play Cricket Again?
There is no universal number of days. Recovery depends on injury severity, ligaments involved, associated injuries, previous sprains, age, training load, rehab quality, and the demands of your role.
What actually matters:
- Symptoms: Pain and swelling should be minimal and settle within 24 hours after training.
- Function: Normal gait, good single-leg control, confident movement.
- Strength: Calf, peroneals, foot, and hip strength comparable to the other side.
- Balance: Single-leg balance and dynamic tests within acceptable ranges.
- Running ability: Jogging to sprinting without pain or limping.
- Sprinting: Maximal efforts tolerated without symptom increase.
- Cricket-specific demands: Role-based drills completed without flare.
- Medical findings: Clinical assessment supports return; imaging if indicated.
- Rehabilitation progress: Consistent improvement in strength, balance, and function.
Work with a clinician to determine readiness; do not self-clear based on time alone.
15 FAQs: Ankle Sprain in Cricket
1. How long does an ankle sprain take to heal?
Healing time varies. Mild sprains may improve in a few weeks; moderate to severe sprains can take 6–12 weeks or longer, especially if associated injuries exist. Recovery depends on severity, rehab quality, and individual factors.
2. Can I play cricket with an ankle sprain?
Playing through a significant sprain increases reinjury risk and may worsen damage. Mild sprains may allow modified participation, but only under medical guidance and with appropriate protection.pmc.ncbi.nlm.nih+1
3. Do I need an X-ray for an ankle sprain?
Not always. X-rays are indicated if there’s bony tenderness, inability to bear weight, or other red flags per Ottawa Ankle Rules. Many sprains do not require X-ray.
4. When is an MRI needed?
MRI is considered for complex injuries, persistent symptoms, suspected high ankle sprain, or when soft-tissue detail will change management. Most uncomplicated sprains do not need MRI.
5. What is the difference between a sprain and a fracture?
A sprain is a ligament injury; a fracture is a broken bone. Fractures often present with bony tenderness, deformity, or inability to bear weight. X-rays help differentiate.
6. When can I start running after an ankle sprain?
Once walking is pain-free, swelling is controlled, and basic strength/balance are restored. Start with jogging, then progress gradually based on symptom response.
7. When can I sprint after an ankle sprain?
Only after submaximal running is well tolerated, strength and balance are restored, and hopping/landing drills are pain-free. Sprinting is a late-stage progression.
8. Can a fast bowler return after an ankle sprain?
Yes, but progression must be careful due to high front-foot loads. Run-up, delivery, and spell volume should increase gradually with close monitoring.
9. When can I bat after an ankle sprain?
Once running and change-of-direction tasks are tolerated. Start with stationary batting, then footwork, then running between wickets, progressing to match-intensity scenarios.
10. When can I return to fielding?
When sprinting, cutting, jumping, and landing are pain-free and controlled. Begin with jogging, then progress to full fielding drills and match simulation.
11. How can cricketers prevent ankle sprains?
Through strength training, balance/proprioception work, appropriate warm-up, load management, suitable footwear, and surface awareness. Prior sprain history requires focused prevention.ejournal.
12. Are ankle strengthening exercises useful?
Yes. Strengthening calf, peroneals, foot, and hip muscles improves dynamic stability and reduces reinjury risk.
13. Does balance training help prevent another ankle sprain?
Yes. Proprioceptive training significantly reduces ankle sprain incidence by improving neuromuscular control and joint position sense.
14. Why does my ankle still feel unstable after a sprain?
Residual strength/balance deficits, incomplete rehab, or altered movement patterns can cause persistent instability. Targeted rehab usually helps.
15. Can an ankle sprain become a long-term problem?
Yes, if rehab is incomplete. Recurrent sprains and chronic ankle instability can develop, affecting performance and increasing future injury risk.

Final Thoughts
Ankle sprain in cricket is common, but it doesn’t have to be career-limiting. Early assessment rules out fractures and high ankle sprains. Structured rehabilitation restores mobility, strength, balance, and cricket-specific control. Gradual return to running, sprinting, and role-based drills ensures the ankle is truly ready—not just pain-free. Prevention is the long game: strength, balance, smart load management, appropriate footwear, and recovery habits keep ankles resilient across seasons.
The most practical takeaway: Don’t rush back. Build a strong, balanced, confident ankle through progressive rehab and cricket-specific preparation. That’s how you return to play—and stay there.
Medical Disclaimer
This article is for general education and does not replace an examination, diagnosis, or personalized treatment plan from a qualified doctor, sports physician, physiotherapist, or other licensed healthcare professional. Ankle pain can have multiple causes, including ligament injury, fracture, tendon problems and other conditions. Online information cannot determine the exact severity of an injury. Do not use this article to decide whether to continue playing, take medication, use an injection, or avoid medical care. Seek appropriate medical attention for severe pain, significant swelling, inability to bear weight, deformity, numbness, suspected fracture, or persistent instability. Any rehabilitation and return-to-play programme should be adapted to the player’s age, injury, medical history, playing role and clinical findings.